Turning a 2D image into a 3D model can seem like a daunting task, especially when working with low-resolution, pixelated images. However, with the right tools and a step-by-step guide, the process can be straightforward and even enjoyable. This blog will walk you through how to convert a 2D image or logo into a detailed 3D model using free, open-source software like Inkscape and Blender. Whether you're a beginner or an experienced designer, these methods will help you create professional-grade 3D models.
In this guide, we'll cover:
- How to import and trace a 2D image in Inkscape
- Exporting the vector image to Blender
- Creating a 3D model in Blender from the vector file
- Adding thickness, lighting, and textures to your model
- How to render your 3D model
These steps will answer common questions like "How to turn a 2D image into a 3D model," "Creating a 3D render from a 2D image," and related queries. For a visual guide, checkout this awesome video by Polyfjord.
Step 1: Importing and Tracing a 2D Image in Inkscape
Inkscape is a powerful open-source vector graphics software that allows you to trace 2D images and convert them into vector files, which are essential for creating 3D models. Unlike raster images (JPEGs, PNGs), vector files are resolution-independent, making them perfect for this process.
Downloading and Installing Inkscape
First, you'll need to download Inkscape, which is free and available for all major operating systems. Once installed, follow these steps:
- Capture your image: If you have a low-resolution logo or image, use the screenshot tool (Windows + Shift + S) to select your desired area. This saves the image to your clipboard.
- Paste into Inkscape: Open Inkscape and press
Ctrl + V to paste the image. You can scale it down while holding the Ctrl key to maintain proportions and position it in the center of your workspace.
Tracing the Image
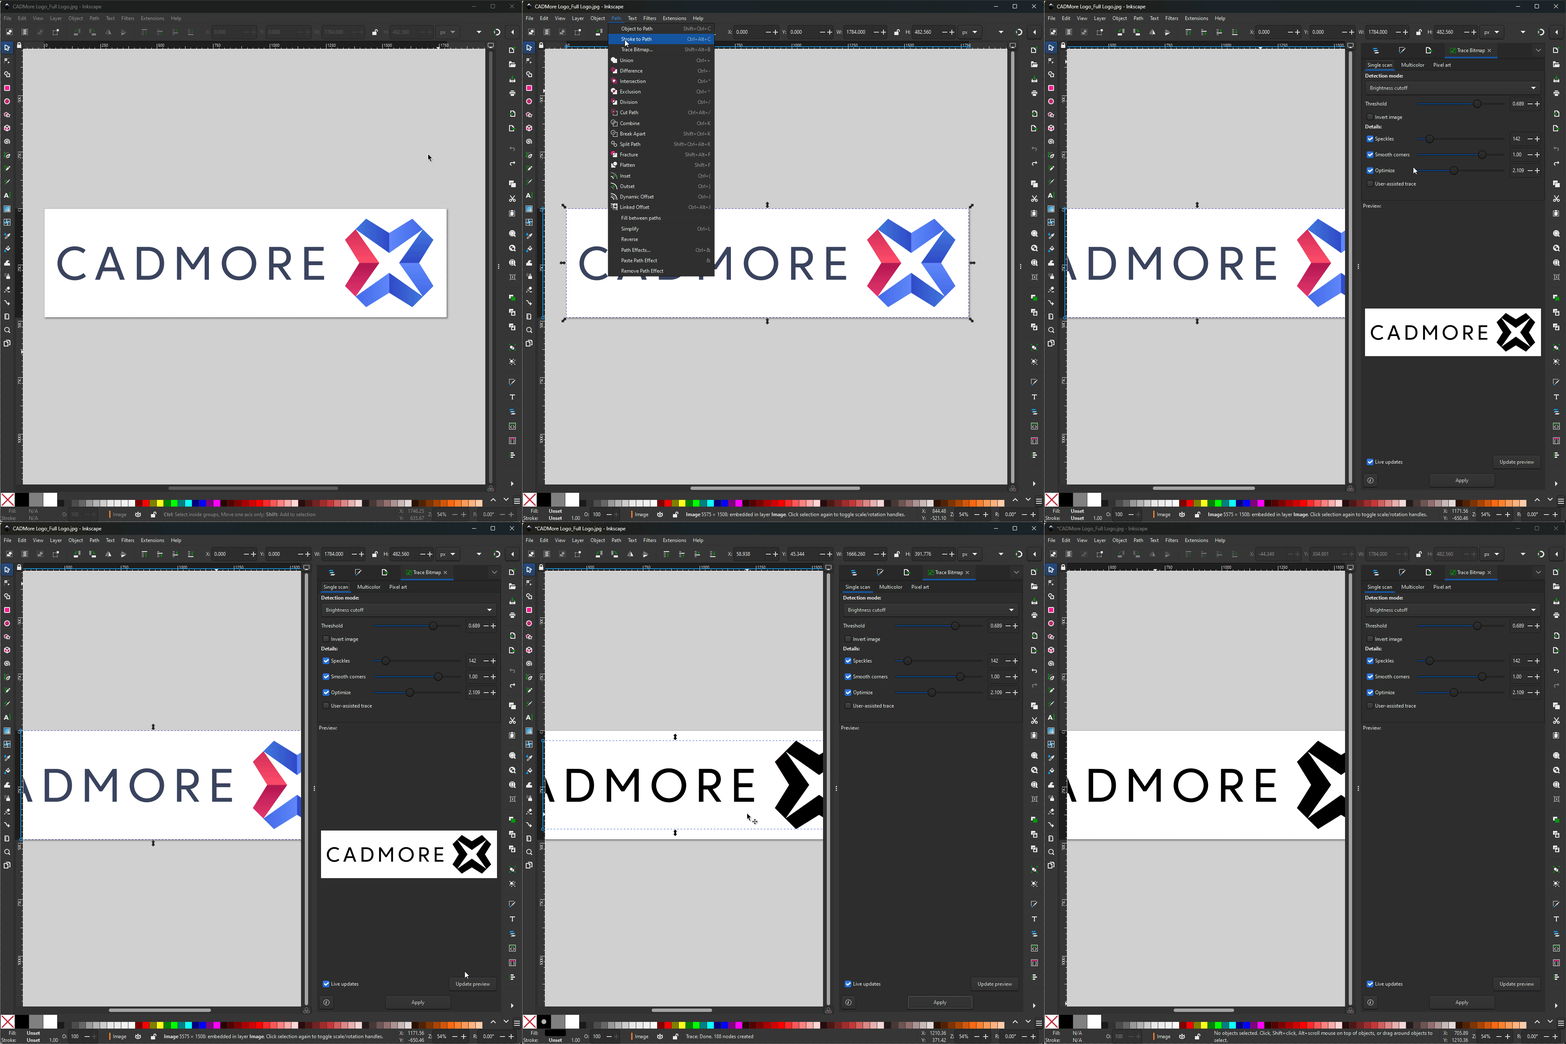
The goal here is to convert the raster image into a vector format (SVG) to be used in Blender. In Inkscape:
- Go to Path > Trace Bitmap: This tool will trace your image, creating vector paths.
- Adjust the settings: If your logo has a single color, use the single scan option. If your image has multiple colors, opt for multi-color scan. Adjust the number of colors and thresholds to fit your image's complexity.
- Preview and apply: Enable live preview to see how your image is being traced. Adjust the settings until the vector version of your image looks clean and detailed.
- Invert if needed: You may need to invert the colors to get the right look (for example, turning the logo black).
- Delete the original image: Once traced, you can remove the low-res image, leaving behind a sharp, clean vector file.
After tracing, you’ll have a vector image ready for 3D modeling.

Step 2: Exporting the Vector Image to Blender
Now that you’ve created your vector file, you can import it into Blender, a powerful 3D modeling software that is also free and open-source.
Saving the Vector File
- Save as SVG: In Inkscape, go to
File > Save As, and select "Scalable Vector Graphics (SVG)" as the file type. Save this file to a location you can easily access later, like your desktop.
Step 3: Importing and Setting Up in Blender
Blender is where the magic happens, transforming your 2D image into a fully-fledged 3D model. If you don’t have Blender installed, download the latest version (at the time of writing, it's Blender 3.6).
Importing the Vector File
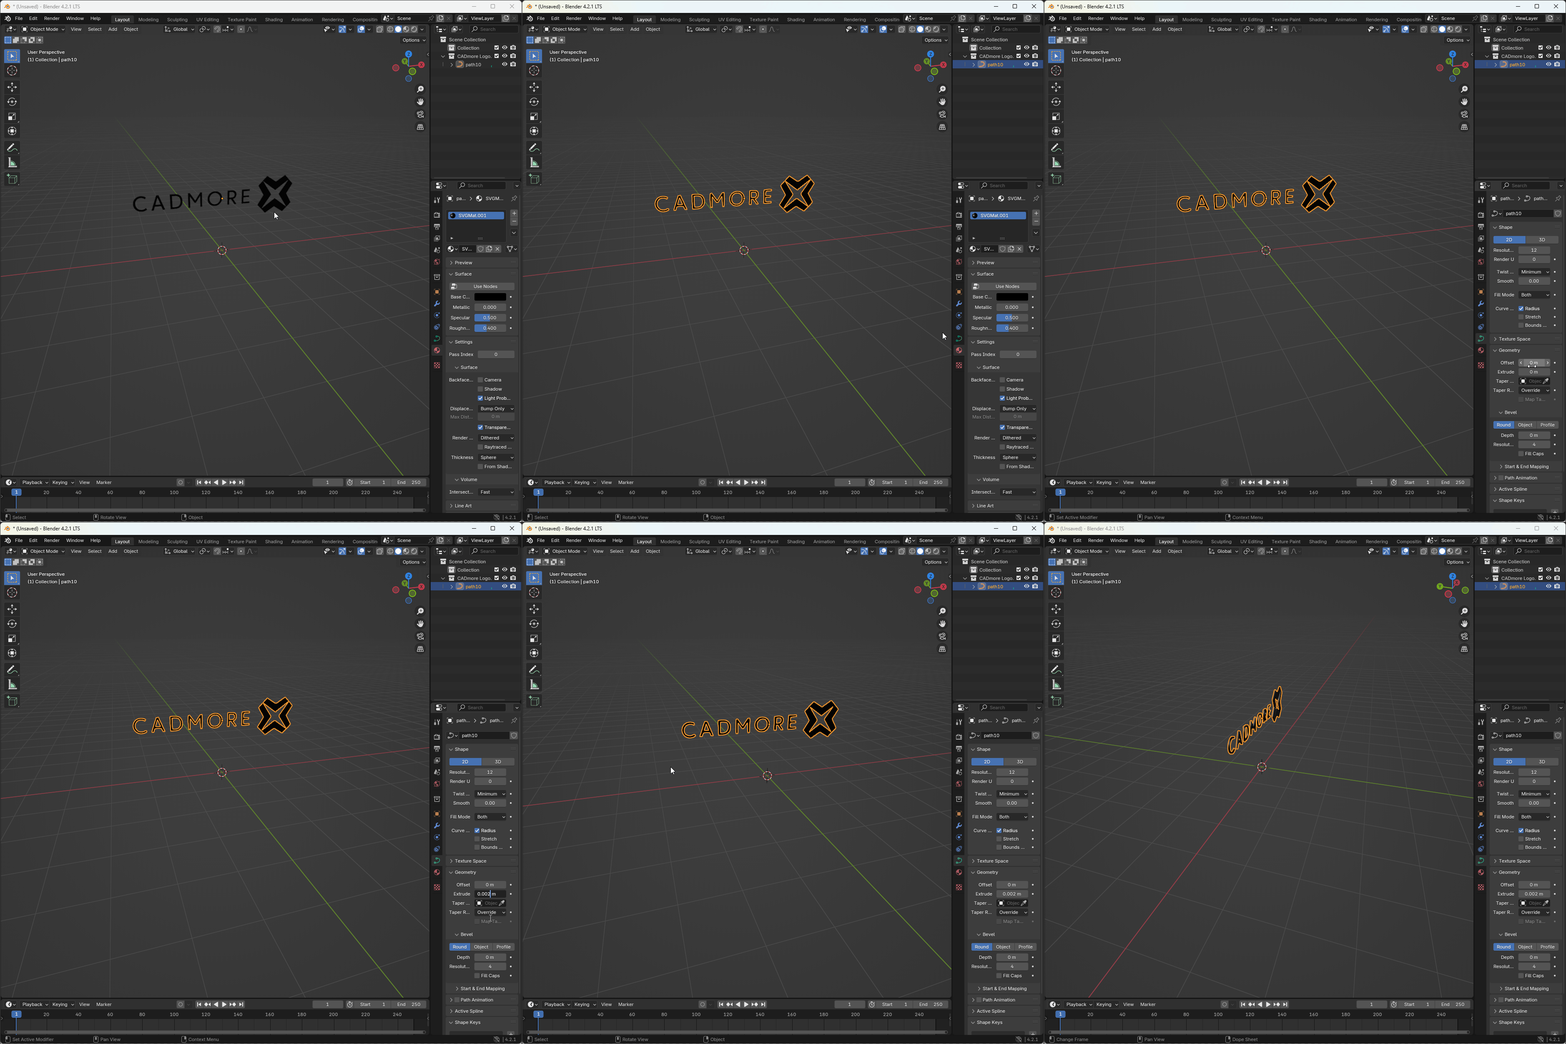
- Open Blender and clean the scene: When you first open Blender, there are default objects in the scene (a cube, light, and camera). Select all (
A), then delete them (X).
- Import your SVG: Go to
File > Import > Scalable Vector Graphics, find the SVG file you saved, and click Import.
Your vector object will now appear in the scene. However, it might be too small, so press A to select everything and scale it up (S).
Converting to a 3D Object
By default, the imported SVG is flat, and we want to give it thickness to make it a 3D object.
-
Go to Object Data Properties > Geometry: Under geometry settings, find the extrude option. This will add depth to your flat SVG file.
-
Set the thickness: Drag the extrude slider while holding Shift to precisely control your object's thickness. Even a small amount (e.g., 0.002) can make a big difference.

Step 4: Adding Materials, Lights, and Textures
Now that your logo or image has been turned into a 3D object, it’s time to make it look realistic by adding materials, lighting, and textures.
Changing Materials
- Go to Material Properties: Blender assigns a default material to imported SVGs. You can remove this by clicking
X.
- Create a new material: Click "New" to create a fresh material. You can assign different shaders (e.g., glossy, metallic) depending on the look you’re going for. If you want a shiny, metallic effect, use the Glossy BSDF shader.
Adding Lights
For proper 3D rendering, lighting is crucial.
- Add an Area Light: Go to
Shift + A > Light > Area to add a light source. Move and rotate it to illuminate your model effectively.
- Switch to Render View: Change your viewport shading to rendered mode so you can see how the light affects your model. Adjust the light’s intensity and position as needed.
Creating a Ground Plane
To anchor your object in a scene:
- Add a plane: Go to
Shift + A > Mesh > Plane to create a flat surface beneath your object.
- Scale and position the plane: Scale it up (
S) and move it into place to act as a ground for your 3D model.
Step 5: Rendering the Final 3D Model
Once your 3D model is complete, you’ll want to render it as a still image or an animation.
- Set up the camera: Add a camera (
Shift + A > Camera), and align it to the view you want to render (Ctrl + Alt + Numpad 0).
- Fine-tune the camera: Move and rotate the camera to get the best framing for your model.
- Add depth of field (optional): If you want to create a sense of scale, add depth of field by adjusting the camera settings in
Object Data Properties > Depth of Field. Set the focus point and f-stop to control how much of the scene is in focus.
- Render your image: When ready, go to
Render > Render Image to create a high-quality still image of your 3D model.
Conclusion: Why Choose CADmore for Your 3D Design Needs
Converting a 2D image into a 3D model using free, open-source tools like Inkscape and Blender is an accessible and cost-effective solution for hobbyists and small projects. However, more complex projects often require expert knowledge, precision, and experience with professional-grade tools. At CADmore, we specialize in turning 2D concepts into fully realized 3D models, whether you're working with logos, product designs, or engineering components.
Our team is highly experienced in advanced 3D modeling, rendering, and manufacturing processes, and we regularly assist clients with large-scale or complex projects that they may not be equipped to handle on their own. If you're looking for professional help with your 3D design needs, from simple conversions to intricate designs, CADmore would be delighted to assist.
Inkscape and Blender are powerful, free, and open-source tools that can get you started, but for more detailed and complex projects, partnering with CADmore ensures that your vision is executed to perfection. Reach out to us today to discuss your next 3D project!